
yongyong-e
Tensorflow는 TF_CPP_MIN_LOG_LEVEL 이라는 환경 변수를 통해 로깅을 제어 할 수 있다. 기본값은 0 (모든 로그가 표시됨)이지만 INFO 로그를 필터링하려면 1, WARNING 로그를 필터링하려면 2, ERROR 로그를 추가로 필터링하려면 3으로 설정할 수 있다. 기본적으로 Tensorflow 코드를 컴파일하면 아래와 같은 로그를 볼 수 있다.12345678import tensorflow as tf hello = tf.constant('Hello, TensorFlow!')print(hello) with tf.Session() as sess: print(sess.run(hello)) sess.close()cs>> Tensor("Const:0", shape=(), dtype=strin..
1) Tensor 자료형을 constant를 이용하여 생성1234import tensorflow as tf const = tf.constant('Hello Tensorflow!!!')print(const)cs>> Tensor("Const:0", shape=(), dtype=string) 2) Tensor 자료형은 python에서 호출 불가능, 따라서 Tensorflow에서 제공하는 Session() 함수의 run을 통해 호출 가능1234567import tensorflow as tf const = tf.constant('Hello Tensorflow!!!') with tf.Session() as sess: _const = sess.run(const) print(_const)cs>> b'Hello Tens..
 [라즈베리파이3] 구글 어시스턴트 서비스 사용하기 (4)
(4) Google Assistant SDK 설치 및 Sample 코드 실행1. 라즈베리파이 환경 구성$ sudo apt-get update$ sudo apt-get install virtualenv$ mkdir googleAssistant$ cd googleAssistant$ virtualenv env --python=python3.5$ source env/bin/activate 2. Google Assistant SDK 패키지 및 종속성 설치$ sudo apt-get install portaudio19-dev libffi-dev libssl-dev # googleAssistant (env) $ pip install --upgrade google-assistant-sdk[samples] (env) $ ..
 [라즈베리파이3] 구글 어시스턴트 서비스 사용하기 (3)
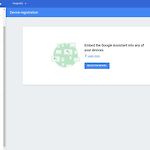
(3) 장치 모델 등록REGISTER MODEL 클릭하여 진행 1. 아래와 같이 빈칸을 작성 2. credentials.json 파일은 미리 다운로드 받아놓기 3. 이부분은 Skip 4. 장치 등록이 완료되면 아래와 같이 확인 가능
 [라즈베리파이3] 구글 어시스턴트 서비스 사용하기 (2)
(2) 구글 어시스턴트 프로젝트 구성1. 프로젝트 추가하기https://console.actions.google.com에 들어가서 프로젝트 추가 2. 프로젝트에서 Google Assistant API를 사용할 수 있도록 설정구글 클라우드 플랫폼 접속, https://console.developers.google.com API 및 서비스의 라이브러리에서 Google Assistant API 검색 후, 사용설정
 [라즈베리파이3] 구글 어시스턴트 서비스 사용하기 (1)
(1) 라즈베리파이 오디오 구성 및 테스트1. 녹화 및 재생 장치 찾기$ arecord -l $ aplay -l arecord -larecord -l2. 마이크와 스피커 사용 설정 $ nano .asoundrc 아래 스크립 작성12345678910111213141516171819pcm.!default { type asym capture.pcm "mic" playback.pcm "speaker" } pcm.mic { type plug slave { pcm "hw:," } } pcm.speaker { type plug slave { pcm "hw:," } }Colored by Color Scriptercs 3. 녹음 및 재생 확인볼륨 조절$ alsamixer스피커 테스트$ speaker-test -t wav..
1) AWS 가입 1. https://aws.amazon.com을 열고 [AWS 계정 만들기]를 선택하십시오. 2. 온라인 지시 사항을 따르십시오. 2) IAM 사용자 만들기1. AWS 계정에 adminuser라는 관리 사용자를 만듭니다. 지침은 사용자 및 관리자 그룹 처음 생성을 참조하십시오 . 2. 사용자는 특정 URL을 사용하여 AWS Management Console에 로그인 할 수 있습니다. 자세한 내용은 사용 설명서에서 계정에 로그인하는 방법을 참조하십시오 . 3) AWS CLI 시작하기 AWS 커맨드라인 인터페이스 구성1. git clone https://github.com/yonghankim/aws-polly2. cd aws-polly3. virtualenv env --python=pyth..
 [Error] protoc object_detection/protos/*.proto --python_out=.
Install protobuf 3 on Ubuntu# Make sure you grab the latest version curl -OL https://github.com/google/protobuf/releases/download/v3.2.0/protoc-3.2.0-linux-x86_64.zip # Unzip unzip protoc-3.2.0-linux-x86_64.zip -d protoc3 # Move protoc to /usr/local/bin/ sudo mv protoc3/bin/* /usr/local/bin/ # Move protoc3/include to /usr/local/include/ sudo mv protoc3/include/* /usr/local/include/ # Optional: c..
https://stackoverflow.com/questions/48333362/opencv-assert-false-in-file-qasciikey-cpp I was wrong. You said it run fine at first... Then I search for qasciikey.cpp, find it is a Qt file. Did you compile OpenCV with flag WITH_QT=ON? Maybe change flag to WITH_QT=OFF, this is not use Qt, will work.